Sensor settings
Step 1. Open the Kivi as shown in "Recover sensor data" to access the USB port
Step 2. Accessing the SD card
- Navigate to the storgage device on your computer with the same name as the sensor.

Step 3. How to set the date and time
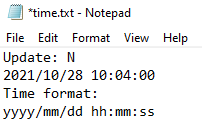
- Open the "time.txt" file and edit the date and time in the format yyyy / mm / dd hh: mm: ss .
- Replace the "Update: N" (no update) to "Update: Y" (yes update) and save the file.
-
Important: The time will only update after the device has been started again. To update the date and time, you will need to re-activate the sensor with the magnetic switch. Once the sensor is re-activated, it will read the new date and time from time.txt file and update it.
-
Note: Kivi has it's own internal clock. It is only necessary to update the time, when
- using Kivi for the first time
- moving to the different time zone
- time in the Kivi clock is not correct.
Step 4. Set the measurement time
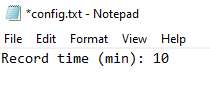
- Open the "config.txt" file and edit the number after the "Record time (min):".
-
Enter 1 to 999 (minutes). NOTE: You must input integers only (e.g. 1, 3, 30) and NOT values with decimals (e.g. 2.5 or 99.9)! Save the file.
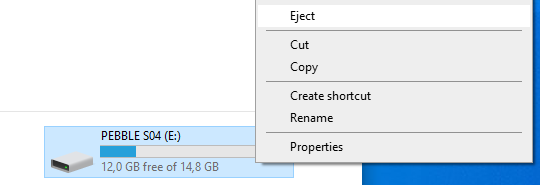
Step 5. Safely remove the device from your computer
- Right click on the device and eject the sensor.